Category: Budgeting & Saving

  • How to Build an Emergency Fund Step by Step: From Zero to 6 Months of Security in 2025

    How to Build an Emergency Fund Step by Step: From Zero to 6 Months of Security in 2025

    Life doesn’t care about your budget. One minute everything is fine, and the next your car breaks down, you get an unexpected medical bill, or you lose hours at work. I learned this the hard way three years ago when my car needed a $1,200 repair and I had exactly $87 in my savings. I had to put it on a high-interest credit card and it took me 7 months to pay it off.

    That was the moment I realized an emergency fund is not optional. It’s your financial airbag.

    If you’re living paycheck to paycheck and the idea of saving 6 months of expenses sounds impossible, don’t worry. This guide will show you how to build an emergency fund step by step, starting from literally zero, even if you are on a low income. This isn’t about being perfect, it’s about being prepared.

    If you are just starting your financial journey, you might want to read our How to Create a Monthly Budget That Actually Works ? first to understand how this fund fits into the big picture.

    What Exactly Is an Emergency Fund And What It’s NOT?

    An emergency fund is a separate stash of cash you set aside only for true, unexpected emergencies. Think of it as your personal financial insurance policy.

    It IS for:

    • A sudden job loss
    • An urgent medical or dental expense
    • Essential car repairs to get to work
    • An emergency home repair like a leaking roof or broken furnace
    • An urgent flight for a family emergency

    It is NOT for:

    • A Black Friday sale
    • A new iPhone
    • A vacation deal you found
    • Christmas gifts
    • A concert ticket

    The key rule is this: If it was unexpected, urgent, and necessary for your health, income, or safety, it’s an emergency. Everything else should be covered by a separate sinking fund for planned expenses.

    Not having one is incredibly expensive. According to a Federal Reserve study, 32% of Americans cannot cover a $400 emergency with cash. When you don’t have an emergency fund, every emergency turns into debt. That $800 car repair becomes $1,100 after credit card interest. That’s the cycle we are going to break today.

    How Much Should Your Emergency Fund Actually Be?

    The internet will tell you to save 3 to 6 months of expenses, which is true, but it can feel overwhelming to start. So let’s break it into two levels.

    Level 1: Your Starter Emergency Fund – $500 to $1,000

    This is your first goal. If you have zero savings right now, your only job is to get to $1,000 as fast as you can. Why $1,000? Because it covers 90% of life’s small emergencies like a tire replacement, a vet bill, or a minor ER visit. Having this small buffer stops you from going into debt while you build the bigger fund.

    Level 2: Your Fully-Funded Emergency Fund – 3 to 6 Months

    Once you have your starter fund and have paid off high-interest debt, it’s time to build the full fund.

    • Save 3 months if: You have a stable job, you are single with no dependents, you have job security, or you have a dual-income household.
    • Save 6 months if: You are self-employed, your income is variable, you have dependents, you are the single earner in your household, or you work in an unstable industry.

    How to Calculate YOUR Number [With Example]

    Forget your income. We calculate emergency funds based on EXPENSES.

    1. List your essential monthly expenses: Rent/Mortgage, Utilities, Groceries, Insurance, Car Payment, Gas/Transport, Minimum Debt Payments.
    2. Do NOT include eating out, shopping, entertainment, or subscriptions you can cancel.
    3. Add it all up. That’s your bare-bones monthly number.

    Example: Sarah’s essentials:
    Rent: $1200 + Groceries: $400 + Utilities: $150 + Car Insurance: $120 + Gas: $100 + Phone: $50 = $2020 per month.

    • Her 3-month fund = $2020 x 3 = $6,060
    • Her 6-month fund = $2020 x 6 = $12,120

    Her first goal is $1,000. Her second goal is $6,060. Simple, clear, and personal.

    Where to Keep Your Emergency Fund? Don’t Make This Mistake

    This is where most beginners mess up. The worst place to keep your emergency fund is in your regular checking account where you can easily spend it.

    You need two things: Safety + Accessibility. You want it safe from yourself, but accessible in 1-2 days when you need it.

    The BEST Place: High-Yield Savings Account [HYSA]

    This is the gold standard. It’s separate from your checking account, it earns you 4-5% interest right now, it’s FDIC insured, and you can transfer the money within 24 hours. It’s boring, and that’s the point. Banks like Marcus, Ally, or Capital One 360 are perfect for this.

    Where You Should NEVER Keep It:

    • In your checking account: Too easy to spend.
    • Under your mattress: Not safe, loses value to inflation, earns zero interest.
    • In the stock market or crypto: Too volatile. What if your emergency happens when the market is down 30%? You just doubled your problem.
    • In a CD or Certificate of Deposit: You will pay a penalty to get your own money in an emergency.

    Pro Tip: Name your account. Log into your bank and rename that HYSA to “My Job-Loss Safety Net” or “Do Not Touch Fund”. Studies show this psychological trick makes you 3x less likely to spend it.

    How to Build an Emergency Fund Step by Step: The 8-Step Blueprint

    Alright, let’s get to the actual plan. Here is the exact blueprint I used to go from $0 to 6 months.

    Step 1: Set a Crystal-Clear Goal

    Vague goals fail. “I want to save money” doesn’t work. “I will save $1,000 in my emergency fund by October 31st by saving $125 a week” works.

    Write it down. Put it on your fridge. Open a separate savings account today, even if you put $0 in it. The act of opening it builds momentum.

    Step 2: Track Your Spending for 30 Days

    You can’t save what you don’t measure. For the next 30 days, track every single dollar you spend. You will be shocked where your money goes.

    You don’t need to be fancy. A notes app on your phone is enough. Or if you want to automate this, our Best Budgeting Apps for Beginners guide shows you the top 5 free apps that do this for you automatically and categorize your spending.

    This one step alone helps my readers find an average of $200-$300 in hidden spending they can redirect to savings.

    Step 3: Create a Bare-Bones Budget That Works for YOU

    Now that you know where your money is going, you need a plan to tell it where to go. A budget is not a punishment, it’s a spending plan for the life you actually want.

    There are two methods my readers love:

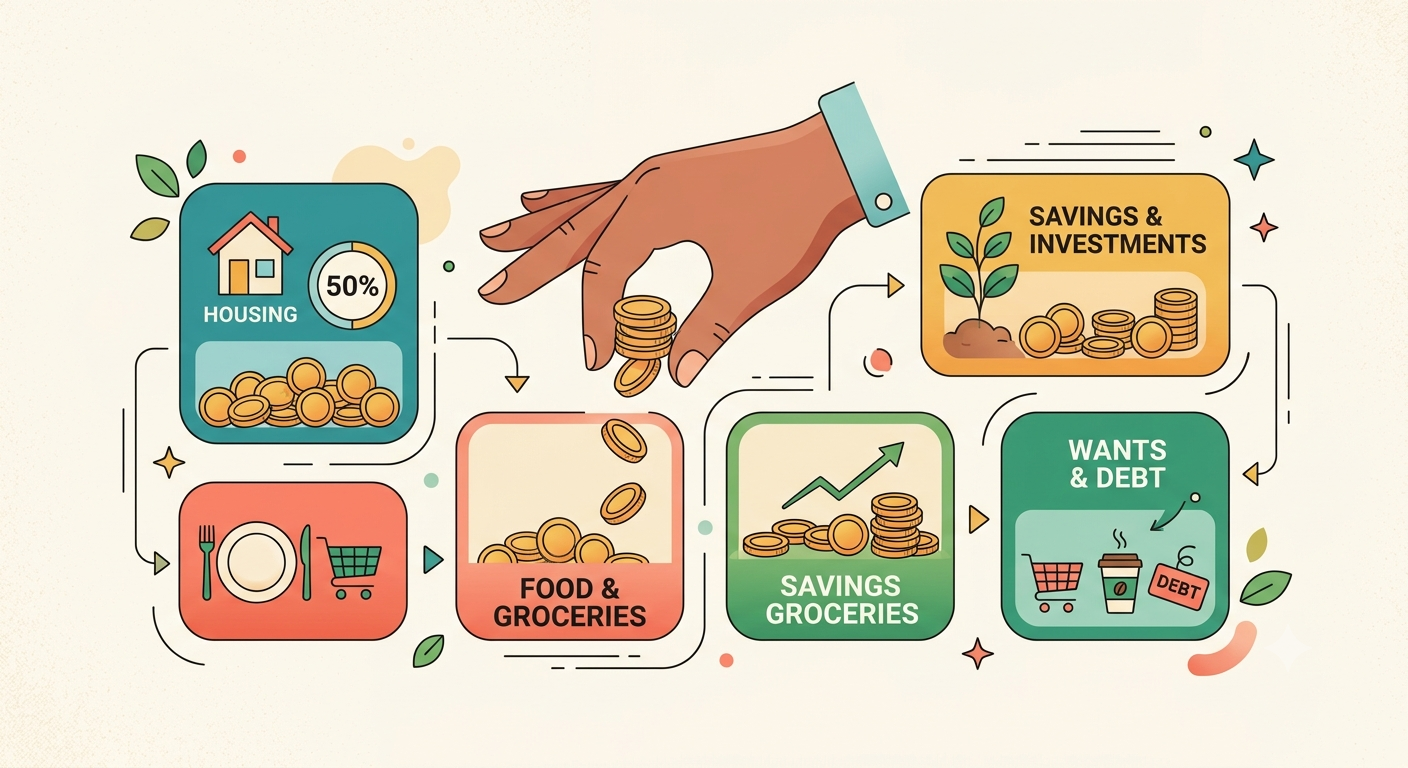
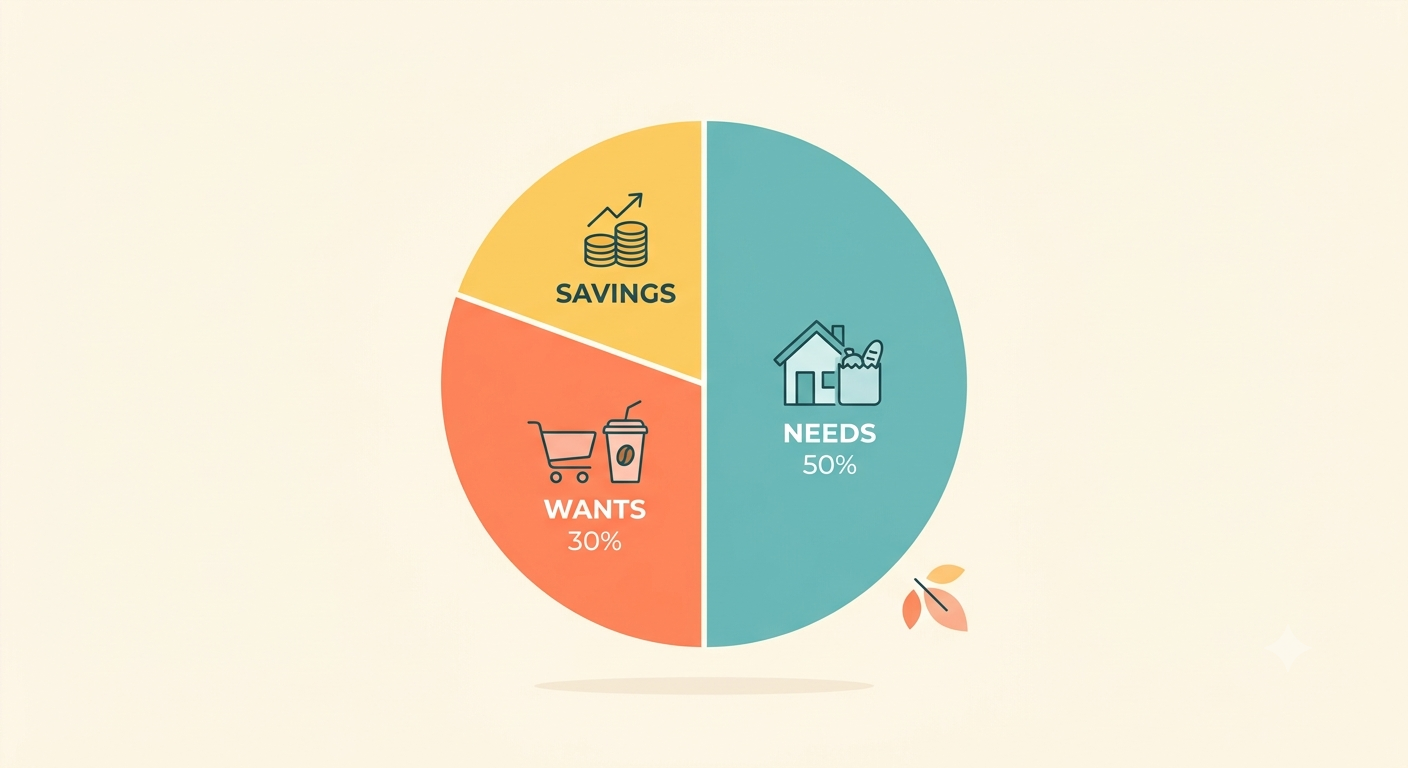
    If you like simplicity and rules, you will love the 50/30/20 Budget Rule guide. It’s simple: 50% of your income for Needs, 30% for Wants, and 20% for Savings and Debt Payoff. Your emergency fund comes out of that 20%.

    If you want total control and want to give every single dollar a job, then try the Zero-Based Budgeting: A Beginner’s Guide. In this method, your Income minus all Expenses, Savings, and Giving equals zero. It’s powerful because it forces you to be intentional with your emergency fund contribution.

    Pick one. Don’t overthink it. The best budget is the one you will actually follow.

    Step 4: Open a Separate, Hard-to-Touch Account

    As we discussed, open that High-Yield Savings Account today. If you already have one, make sure it’s at a DIFFERENT bank than your checking account. Adding that small friction of 1-2 day transfer time will stop 90% of impulse withdrawals.

    Set up to automatically save. Most banks let you create automatic transfers.

    Step 5: Automate Your Savings – Pay Yourself First

    This is the most important step. Stop trying to save what’s left at the end of the month. There is never anything left.

    Pay yourself first. Treat your emergency fund contribution like a bill.

    Go to your payroll or your checking account right now and set up an automatic transfer of $25, $50, or $100 every payday directly into your emergency fund. Even if it’s just $10. What gets automated, gets done.

    If your employer allows you to split your direct deposit, even better. Send 5% of your paycheck directly into your savings before you even see it. You won’t miss what you never had.

    Step 6: Find Extra Money to Supercharge Your Fund

    Your automated savings is the foundation, but if you want to hit that $1,000 starter goal fast, you need to throw extra logs on the fire.

    Here are 3 fast wins that have worked for my community:

    1. The 72-Hour Stuff Sale: Go around your house and find 5 things you haven’t used in 90 days. Sell them on Facebook Marketplace. Old game console, clothes, coffee maker. Average person makes $150-$300 in a weekend.
    2. The No-Spend Challenge: Pick one spending category like eating out or online shopping and go on a no-spend for 7 days. Take that money and dump it into your fund.
    3. Cash in Your Skills: Can you babysit for 2 hours? Walk a dog? Do a small freelance task on Fiverr? One extra $100 gig a month is $1,200 a year.

    Step 7: Make It Untouchable – Unless It’s a REAL Emergency

    Define your emergency BEFORE it happens. Write it on a card and keep it in your wallet.

    Ask these three questions before you touch the fund:

    1. Is it unexpected?
    2. Is it urgent?
    3. Is it necessary?

    If you answer YES to all three, use the fund guilt-free. That’s what it’s for. If not, it’s not an emergency.

    Step 8: Replenish and Grow As Your Life Changes

    Using your emergency fund is not failure, it’s success! It did its job. Your next step is to pause other extra savings and replenish it back to its target as quickly as you can.

    Also, you need to increase your fund when your life changes. Got a raise? Increased rent? Had a baby? Your bare-bones monthly number just went up, so your 3-6 month target needs to go up too. Review your fund every 6 months.

    How to Build an Emergency Fund on a Low Income (Even $25 a Week Counts)

    I hear this all the time: “This is great, but I don’t make enough to save.”

    I understand. When you’re making $2,000 a month, saving $500 feels impossible. But the truth is, the amount doesn’t matter at first, the habit does.

    If all you can do is $10 a week, start with $10 a week. In a year, that’s $520 plus interest. That’s more than halfway to your starter fund.

    Here is how to make it work on a tight budget:

    • Micro-savings: Use apps that round up your purchases. Buy coffee for $3.50, it rounds up to $4.00 and saves $0.50. It doesn’t feel like anything, but it adds up to $30 a month.
    • The One Less Rule: One less takeout meal a week = $40-$60 a month = $500+ a year for your emergency fund.
    • Windfall Rule: Any unexpected money – tax refund, birthday money, bonus – send 50% of it directly to your emergency fund before you do anything else.

    Your income does not determine if you get to feel secure. Your consistency does.

    5 Common Emergency Fund Mistakes That Keep You Broke

    1. Saving too much, too fast: Don’t try to save 6 months while you have 22% APR credit card debt. Save your $1,000 starter fund, then attack high-interest debt, then build the full 6-month fund.
    2. Keeping it in your checking account: We covered this. Separation is key.
    3. Setting the goal too high at first: If you set a $12,000 goal on day one, you will quit. Start with $500, celebrate, then go to $1,000.
    4. Forgetting to replenish: The emergency fund is not a one-time project.
    5. Feeling guilty for using it: That’s financial shame. The fund exists to be used. Use it, then rebuild.

    FAQ: Your Emergency Fund Questions Answered

    How long does it take to build a 6-month emergency fund?
    It depends on your income and expenses. If you save 10% of a $3,000 monthly income, a $10,000 fund will take about 33 months. But if you supercharge it with selling items and extra income, many people do it in 12-18 months. Remember, your $1,000 starter fund can be built in 1-3 months.

    Should I pay off debt or build an emergency fund first?
    Do both in order: Save $500-$1,000 starter fund FIRST for small emergencies. Then, aggressively pay off high-interest debt [above 7%]. Then, build your full 3-6 month emergency fund. This prevents you from going deeper into debt while paying debt off.

    What counts as an emergency? Is my car insurance premium an emergency?
    No. Car insurance is a predictable bill. That’s a sinking fund expense. An emergency is an unexpected transmission failure. If you can predict it, it’s not an emergency fund item.

    Conclusion: Your Financial Safety Net Starts Today

    You don’t need to have it all figured out. You just need to start.

    Open that separate High-Yield Savings Account today. Set up an automatic $20 transfer for your next payday. That’s it. You have officially started.

    An emergency fund is more than just money. It’s peace of mind. It’s the ability to say, “I can handle this,” when life throws you a curveball. It’s the foundation that makes every other financial goal possible, from paying off debt to investing for your future.

    For a wider view of where this fits, go back and review our Complete Beginner’s Guide to Personal Finance to see how saving, budgeting, and investing all work together.

    Your next step: After you have your starter emergency fund, learn how to keep better track of your spending and automate everything with our Best Budgeting Apps for Beginners guide.

    You’ve got this. Future you will thank you.

  • Zero-Based Budgeting: What It Is and How to Start

    Zero-Based Budgeting: What It Is and How to Start

    If the 50/30/20 rule feels too loose for you — if you’re the kind of person who wants to know exactly where every dollar is going, not roughly where it’s going — zero-based budgeting is probably the method you’ve been looking for.

    The name sounds more intimidating than the concept actually is. Zero-based budgeting simply means that every dollar of income gets assigned a specific job before the month begins, so that income minus all your planned spending, saving, and debt payments equals zero. Not zero because you spent it all carelessly — zero because nothing is left unaccounted for, sitting around waiting to be spent on something you won’t remember by the time the credit card statement arrives.

    This guide walks through exactly how the method works, how it’s different from other approaches, a full real-number example, and how to set one up yourself this month.

    (This article is part of our Complete Beginner’s Guide to Budgeting and Saving Money — if you haven’t read the full guide yet, start there for the bigger picture before diving into the details below.)

    What Is Zero-Based Budgeting?

    Zero-based budgeting is a system where you assign every dollar of your income to a category — bills, groceries, savings, debt payoff, entertainment, everything — before the month starts, until the total allocated equals your total income exactly.

    Income − (Expenses + Savings + Debt Payments) = $0

    That doesn’t mean you spend everything you earn. “Zero” refers to unassigned dollars, not unspent ones. If you allocate $400 to savings, that $400 is “used” — it has a job, it’s just that its job is to sit in a savings account, not to be spent on something else. The whole point is that nothing is left floating around without a purpose, because unassigned money is exactly the kind of money that quietly disappears by the end of the month.

    This is genuinely different from simply tracking spending after the fact. Zero-based budgeting is planning ahead, not reviewing behind — you decide where the money goes before you have the chance to spend it impulsively.

    How Zero-Based Budgeting Differs From Other Methods

    The clearest way to understand zero-based budgeting is to compare it to the more common alternatives.

    The 50/30/20 rule groups spending into three broad percentage-based buckets — needs, wants, savings — without requiring you to track individual categories closely. It’s simpler to start with but less precise. (See our full 50/30/20 budget rule guide for the details.)

    Pay-yourself-first budgeting automatically sets aside savings and debt payments the moment income arrives, then lets you spend the rest freely without close tracking. It’s the lowest-effort method but offers the least visibility into where your money actually goes.

    Zero-based budgeting sits at the opposite end from pay-yourself-first: maximum detail, maximum control, and — as a trade-off — more setup time each month. Every category gets a specific dollar amount, not a rough percentage or a leftover amount.

    None of these is universally “better.” If you’ve tried simpler methods and kept ending up with money you can’t account for by month’s end, zero-based budgeting is usually the fix, because it removes the possibility of unassigned dollars entirely. If detailed tracking feels exhausting rather than satisfying, you may be better suited to a looser method — our guide comparing the best budgeting methods can help you figure out which fits your personality.

    Step-by-Step: How to Set Up a Zero-Based Budget

    Step 1: List Your Total Monthly Income

    Start with your after-tax, take-home income — the amount that actually lands in your account. If your income varies month to month, use your lowest realistic month as your baseline rather than an average or best-case number, so your plan doesn’t rely on income that might not show up. (Our guide on budgeting on irregular income goes deeper on this if it applies to you.)

    Step 2: List Every Expense You Can Think Of

    This is the step that takes the most effort, and it’s worth doing thoroughly the first time. Go through your last full month of bank and card statements and list every recurring or predictable expense: rent, utilities, groceries, minimum debt payments, subscriptions, transportation, insurance. Don’t forget the small recurring ones — they add up fast and are easy to miss from memory alone.

    Step 3: Assign Every Dollar a Job, Starting With Fixed Costs

    Begin with expenses that don’t change: rent or mortgage, insurance premiums, loan minimums. These get their full amount assigned first, since they’re non-negotiable.

    Step 4: Assign Variable but Predictable Costs

    Next, allocate categories that fluctuate somewhat but happen every month — groceries, gas, utility bills that shift seasonally. Use your tracked history from Step 2 as a guide rather than guessing.

    Step 5: Build In Irregular Expenses

    Annual or occasional costs — car registration, holiday gifts, an annual software subscription — don’t fit neatly into a single month, but they’re entirely predictable if you plan ahead. Divide the yearly total by 12 and assign that monthly amount to a dedicated category, even in months where you don’t spend it. This is essentially a sinking fund, and it’s one of the most underused tricks in budgeting. (Full details in our guide on sinking funds.)

    Step 6: Assign Savings and Debt Payoff Before Flexible Spending

    This is the step that separates zero-based budgeting from simply spending until the money runs out. Decide how much goes to savings and extra debt payments before you allocate anything to flexible spending like dining out or entertainment. Treat it exactly like a bill — non-negotiable, assigned early, not left as an afterthought.

    Step 7: Assign What’s Left to Flexible Spending

    Whatever remains after fixed costs, variable costs, irregular expenses, and savings goes toward flexible spending — the category where you have the most day-to-day control. If this number comes out lower than you’d like, that’s useful information: it tells you exactly which earlier category needs to shrink, rather than leaving you to wonder where the money went at month’s end.

    Step 8: Confirm the Math Equals Zero

    Add everything up. Income minus every category assigned should land at exactly zero. If it doesn’t, adjust — either a category needs trimming, or you’ve found extra income to assign somewhere useful.

    A Full Zero-Based Budget Example

    Here’s how this looks with real numbers, using a take-home income of $4,200 a month.

    Category Amount
    Rent $1,300
    Utilities $180
    Groceries $450
    Transportation (gas + insurance) $220
    Minimum debt payments $300
    Sinking fund (irregular expenses ÷ 12) $150
    Savings $500
    Extra debt payoff $300
    Subscriptions $60
    Flexible spending (dining out, entertainment, misc.) $740
    Total $4,200

    Every dollar has a destination. Notice that savings and extra debt payoff were assigned before flexible spending was calculated — that ordering is what makes zero-based budgeting effective. Flexible spending isn’t ignored; it’s simply what’s left once the priorities that actually move your finances forward are locked in first.

    Tools to Use for Zero-Based Budgeting

    You don’t need specialized software to do this — a spreadsheet with simple addition formulas works perfectly well, and plenty of people stick with one for years. That said, dedicated budgeting apps built specifically around the zero-based method can save time by auto-categorizing transactions and flagging when a category runs low. If manual entry feels like too much friction, our roundup of the best free budgeting apps covers several options worth comparing, including ones designed specifically for this approach.

    Whichever tool you choose, the method matters more than the platform. A basic spreadsheet used consistently will outperform a sophisticated app that gets abandoned after two weeks.

    Pros of Zero-Based Budgeting

    Nothing gets lost or forgotten. Because every dollar is assigned a purpose, there’s no mystery gap between what you earned and what you can account for.

    It forces intentional decisions. Rather than spending on autopilot and hoping savings happens with whatever’s left, you decide in advance exactly how much goes where.

    It adapts naturally to changing circumstances. If your income drops or an expense increases one month, the zero-based structure makes it immediately obvious which category needs to shrink to keep the math balanced — you’re not left guessing.

    It builds real financial awareness over time. After a few months of assigning every dollar deliberately, most people develop a much clearer sense of their actual spending patterns than they had before.

    Cons of Zero-Based Budgeting

    It takes more time upfront than simpler methods. Building a detailed category list and reassigning dollars each month requires more effort than a rough percentage split.

    It can feel restrictive if categories are too narrow. If you create twenty micro-categories instead of a reasonable handful, the system becomes fragile — one unexpected expense in a too-narrow category and the whole plan feels broken. Keep categories broad enough to bend without snapping.

    Irregular income makes it more complex. If your income changes significantly month to month, you’ll need to rebuild parts of the budget more often, which can feel like extra work compared to a simpler percentage-based approach. (Again, our guide on budgeting on irregular income has strategies specifically for this.)

    It requires monthly maintenance, not a one-time setup. Zero-based budgeting isn’t a “build it once” system — it needs a fresh pass each month as income and expenses shift, which is more upkeep than some other methods require.

    Who Zero-Based Budgeting Works Best For

    This method tends to work particularly well if you:

    • Like having detailed visibility into exactly where your money goes
    • Have felt frustrated in the past by budgets that left money “unaccounted for”
    • Are working toward a specific, aggressive goal — paying off debt fast, saving for a house down payment, building wealth on a tight timeline
    • Don’t mind spending 20–30 minutes at the start of each month planning ahead

    It tends to work less well if you find detailed tracking draining rather than clarifying, or if your schedule genuinely doesn’t allow for the monthly setup time it requires. In that case, a looser method like the 50/30/20 rule or pay-yourself-first budgeting may get you 80% of the benefit with a fraction of the effort. There’s no prize for using the most demanding system if it’s one you won’t actually keep using.

    Frequently Asked Questions

    Does zero-based budgeting mean I have to spend all my money? No. “Zero” refers to every dollar being assigned a job, not every dollar being spent on purchases. Money allocated to savings or debt payoff still counts as “assigned,” even though it isn’t spent on day-to-day items.

    How is this different from just tracking my expenses? Tracking records where money went after you’ve already spent it. Zero-based budgeting decides where money will go before you spend it, which is a meaningfully different — and more proactive — approach.

    What happens if I overspend in one category? You adjust another category to cover it, ideally before the month ends rather than after. This is one of the strengths of the method: an overspend in one area is immediately visible as a shortfall somewhere else, rather than a vague sense that “money is tight” with no clear cause.

    Do I need a special app for zero-based budgeting? No — a simple spreadsheet works fine, especially when you’re starting out. Dedicated apps can add convenience through automatic transaction syncing, but they’re not required to use this method effectively.

    How long does it take to set up each month? The first month typically takes the longest, often 30–60 minutes, since you’re building categories from scratch. After that, most people can update and reassign their zero-based budget in 15–20 minutes once the categories are established and only the amounts need adjusting.

    Key Takeaways

    • Zero-based budgeting assigns every dollar of income a specific job so that income minus all allocations equals zero
    • It offers more precision and control than percentage-based methods like the 50/30/20 rule, at the cost of more monthly setup time
    • Assign fixed costs first, then variable costs, then irregular expenses, then savings and debt payoff — flexible spending comes last
    • Keep categories broad enough to bend without breaking; too many narrow categories makes the system fragile
    • It works best for people who want detailed visibility and are pursuing a specific financial goal on a timeline

    If this level of detail feels like more than you need right now, our 50/30/20 budget rule guide offers a simpler starting point. And if you want to see how zero-based budgeting stacks up against every other major method side by side, our comparison of the best budgeting methods breaks it all down in one place.

    This article is for informational purposes only and is not financial advice.

  • The 50/30/20 Budget Rule Explained (With Real Examples)

    The 50/30/20 Budget Rule Explained (With Real Examples)

    If you’ve ever searched “how do I start budgeting” and felt overwhelmed by category-heavy spreadsheets and twenty-line templates, the 50/30/20 rule is probably the first method you should try. It’s not the most precise system out there, and it’s not going to micromanage your coffee spending. What it will do is give you three simple buckets, a rough percentage for each, and enough structure to stop wondering where your paycheck went.

    This guide breaks down exactly how the rule works, walks through real income examples at different pay levels, and — just as importantly — covers when it doesn’t fit your situation, because no single budgeting method is right for everyone.

    (This article is part of our Complete Beginner’s Guide to Budgeting and Saving Money — if you haven’t read the full guide yet, it’s a good place to start before diving into the details below.)

    What Is the 50/30/20 Rule?

    The 50/30/20 rule is a simple budgeting framework that splits your after-tax income into three categories:

    • 50% for needs — the expenses you genuinely can’t avoid: rent or mortgage, groceries, utilities, insurance, minimum debt payments, transportation to work
    • 30% for wants — the things that make life enjoyable but aren’t strictly necessary: dining out, streaming subscriptions, hobbies, travel, shopping
    • 20% for savings and debt payoff — building an emergency fund, contributing to retirement, or paying extra toward debt beyond the minimum

    The concept was popularized by U.S. Senator Elizabeth Warren and her daughter Amelia Warren Tyagi in their book on family finances, and it’s stuck around for one reason: it’s genuinely easy to remember and apply. You don’t need to track twenty categories or set up a complicated spreadsheet. You just need three numbers.

    That simplicity is exactly why it works so well for beginners — and exactly why it eventually stops being precise enough for people with more complex finances. We’ll get to both sides of that.

    How to Calculate Your 50/30/20 Budget

    Start with your after-tax income — what actually lands in your bank account, not your gross salary before deductions. This is an important distinction, because budgeting off your gross pay means you’re planning with money you’ll never actually see.

    Once you know your take-home pay, the math is simple:

    • Multiply your monthly take-home income by 0.50 to get your needs budget
    • Multiply it by 0.30 to get your wants budget
    • Multiply it by 0.20 to get your savings and debt payoff budget

    If your income varies month to month — freelance work, tips, commission — use your average income from the last three to six months, or lean toward your lowest realistic month so you’re not budgeting off a best-case scenario. (Our guide on budgeting on irregular income covers this in more depth if that applies to you.)

    Real Income Examples

    Numbers are easier to understand in context, so here’s how the 50/30/20 split looks at three different income levels. These are illustrative examples — your actual needs percentage will vary based on where you live and your personal circumstances.

    Example 1: $2,800/month take-home pay

    • Needs (50%): $1,400
    • Wants (30%): $840
    • Savings/debt (20%): $560

    At this income level, needs often eat up more than 50% in higher cost-of-living areas, which is worth watching closely. If rent alone is $1,200, you’re already close to the full needs budget before groceries or utilities are even factored in.

    Example 2: $4,500/month take-home pay

    • Needs (50%): $2,250
    • Wants (30%): $1,350
    • Savings/debt (20%): $900

    This is often the income range where the 50/30/20 rule feels most natural to apply, since there’s usually enough breathing room in the “wants” category without needs completely dominating the budget.

    Example 3: $7,000/month take-home pay

    • Needs (50%): $3,500
    • Wants (30%): $2,100
    • Savings/debt (20%): $1,400

    At higher income levels, many people find the 20% savings target actually feels too low — their needs cost far less than 50% of their income, which frees up room to push savings closer to 30% or more. There’s nothing wrong with adjusting the ratio once your basic needs are comfortably covered.

    What Counts as a “Need” vs. a “Want”?

    This is where the 50/30/20 rule gets genuinely tricky, because the line between needs and wants isn’t always obvious — and being honest with yourself here matters more than getting the percentages exactly right.

    Clear needs: rent or mortgage, minimum loan and credit card payments, groceries (the actual staples, not takeout), basic utilities, insurance premiums, transportation required to get to work.

    Clear wants: subscription streaming services, dining out, new clothes beyond basic necessity, hobbies, entertainment, upgraded versions of things you already own.

    The gray area: this is where most people get stuck. Is your phone plan a need or a want? Probably a need, but the premium unlimited plan with extra features might be a want. Is your car payment a need? If you need it to get to work and there’s no reasonable alternative, yes — but the difference between a reliable used car payment and a brand-new luxury vehicle payment is largely a want dressed up as a need.

    A useful test: ask whether a cheaper version of this expense would still meet the actual underlying need. If yes, the gap between the cheap version and what you’re actually paying is really a “want,” even if the category feels essential.

    Pros of the 50/30/20 Rule

    It’s simple enough to actually stick with. You don’t need twenty categories or a finance degree to use it. Three buckets and two multiplications is the entire system.

    It builds in savings automatically. Unlike budgets that treat savings as “whatever’s left over,” the 50/30/20 rule assigns savings a fixed percentage from the start, which means it actually happens instead of getting pushed aside by month-end spending.

    It allows for genuine enjoyment. The 30% “wants” category isn’t a guilt trip — it’s a built-in acknowledgment that life shouldn’t be 100% needs and savings with zero room for things you enjoy.

    It works as a diagnostic tool even if you don’t follow it exactly. Even people who eventually move to a more detailed system often use the 50/30/20 split as a first check: “Am I roughly in the right zone, or is one category wildly out of balance?”

    Cons of the 50/30/20 Rule

    It doesn’t work well in high cost-of-living areas. If rent alone eats 45–55% of your income, the “needs” category becomes unrealistic before you’ve even added groceries or utilities. This is the single most common reason the rule breaks down for people in expensive cities.

    It’s not precise enough for detailed goals. If you’re aggressively paying off debt, saving for a house down payment, or trying to hit a specific retirement number, a flat 20% might not be aggressive enough — or might not tell you exactly where to trim.

    The needs-vs-wants line is genuinely blurry. As covered above, plenty of expenses sit in a gray area, which means two people using the “same” method can categorize things completely differently.

    It doesn’t account for irregular expenses well. Annual costs like car registration or holiday spending don’t fit neatly into a monthly percentage unless you plan for them separately. (Our guide on sinking funds covers exactly how to handle this gap.)

    What If the Percentages Don’t Fit Your Life?

    This is the most important section of this entire guide, because the 50/30/20 rule is a starting framework, not a law. If your needs genuinely require 65% of your income because you live somewhere expensive, forcing the numbers to fit 50% isn’t discipline — it’s just setting yourself up to fail on paper before the month even starts.

    A more realistic approach for a lot of people looks like this:

    • Calculate your actual needs first, honestly, without forcing them into 50%
    • If needs come in higher than 50%, adjust wants downward rather than pretending the gap doesn’t exist
    • Protect the savings percentage as much as possible, even if it means starting smaller than 20% and building up over time
    • Revisit the split every few months as your income or expenses change

    The percentages are a guideline for balance, not a rigid contract. If you find yourself needing 55/25/20 or 45/25/30, that’s not a failure of the method — that’s the method doing exactly what it’s supposed to do: giving you a framework to build your own numbers around.

    50/30/20 vs. Other Budgeting Methods

    The 50/30/20 rule is one of several popular approaches, and it’s worth knowing where it fits relative to the others so you can decide if it’s really the right starting point for you.

    Compared to zero-based budgeting, which assigns every single dollar a specific job down to the last cent, the 50/30/20 rule is far less detailed — which is either a strength or a weakness depending on whether you find detailed tracking motivating or exhausting. See our full zero-based budgeting guide for a side-by-side look.

    Compared to the cash envelope system, which physically limits spending by category, the 50/30/20 rule is more flexible but relies more heavily on self-discipline, since there’s no hard stop once a category runs low.

    If you’re not sure which approach fits your personality best, our guide comparing the best budgeting methods walks through all the major options side by side, including who each one tends to work best for.

    How to Actually Start Using It This Month

    Putting the 50/30/20 rule into practice doesn’t require anything complicated:

    1. Calculate your after-tax monthly income
    2. Multiply by 0.50, 0.30, and 0.20 to get your three target numbers
    3. Track your spending for the first month against those three buckets (a simple app or spreadsheet works fine — see our roundup of the best free budgeting apps if you want something automated)
    4. At the end of the month, compare your actual spending to the targets
    5. Adjust the percentages slightly if needed, based on what you learned, and repeat

    Expect the first month to be somewhat inaccurate. That’s normal — you’re not failing the system, you’re calibrating it to your real life. Most people need two or three months before the numbers start to genuinely reflect how they actually spend.

    Frequently Asked Questions

    Is the 50/30/20 rule based on gross or net income? Net income — what actually lands in your bank account after taxes and deductions. Budgeting off your gross salary means planning with money you’ll never actually have available to spend.

    What if my needs are more than 50% of my income? This is extremely common, especially in higher cost-of-living areas. Rather than forcing an unrealistic split, adjust the wants percentage down and try to protect savings as much as possible, even if it starts smaller than 20%.

    Is 20% savings enough? It’s a reasonable starting target, but not a universal rule. If you’re carrying high-interest debt, prioritizing extra payments there often makes more financial sense than parking the same money in low-interest savings. If your needs are comfortably under 50%, pushing savings higher than 20% is a smart move rather than a requirement to avoid.

    Does the 50/30/20 rule account for debt payoff? Yes — debt payments beyond the minimum typically fall into the 20% “savings and debt” category, while minimum required payments count as a “need,” since they’re not optional.

    How is this different from just tracking my expenses? Tracking tells you where your money went after the fact. The 50/30/20 rule tells your money where to go before you spend it, using three simple targets instead of dozens of granular categories.

    Key Takeaways

    • The 50/30/20 rule splits after-tax income into 50% needs, 30% wants, and 20% savings and debt payoff
    • It’s one of the simplest budgeting methods to start with, especially for beginners
    • The needs-vs-wants line is often blurrier than it seems — be honest rather than technically correct
    • The percentages are a flexible starting guideline, not a rigid rule — adjust them to fit your actual cost of living
    • It works well as a first framework, but people with more complex financial goals often outgrow it in favor of more detailed methods

    If the 50/30/20 split feels too loose for your situation, our guide to zero-based budgeting offers a more detailed alternative where every dollar gets a specific job. And if you’re still deciding which method fits your life best, our full comparison of budgeting methods is the fastest way to figure that out.

    This article is for informational purposes only and is not financial advice.

  • How to Create a Monthly Budget That Actually Works ?

    How to Create a Monthly Budget That Actually Works ?

    Most people don’t fail at budgeting because they’re bad with money. They fail because the budget they built didn’t match how they actually live. They download a template built for someone else’s life, plug in numbers that feel aspirational rather than real, and by day twelve the whole thing falls apart. Then they conclude budgeting “just isn’t for them.”

    It’s not that budgeting doesn’t work. It’s that most budgets are built backward.

    This guide walks through how to create a monthly budget the way it should be built: starting from your real numbers, not your ideal ones, and designing something flexible enough to survive an actual month. By the end, you’ll have a working system, not just a spreadsheet you abandon in two weeks.


    Why Most Budgets Fail Before They Start

    Before getting into the how, it’s worth understanding the why — because if you’ve tried budgeting before and quit, it probably wasn’t your fault.

    Three things sink most first-time budgets:

    • The numbers are guesses, not facts. People estimate what they spend on groceries or eating out instead of checking. The guess is almost always lower than reality.
    • The categories are too rigid. A budget with twenty tiny categories (coffee, parking, snacks, streaming) collapses the moment life doesn’t cooperate.
    • There’s no plan for irregular expenses. Car repairs, birthdays, annual subscriptions — these get treated as “surprises” every single time, even though they’re predictable if you zoom out to a full year.

    A budget that works isn’t the one with the prettiest spreadsheet. It’s the one built from real data, with categories wide enough to bend without breaking.


    Step 1: Find Out What You Actually Earn

    Start with income, because this is the one number people usually get wrong in a way that causes problems later.

    If you’re on a salary with taxes withheld, use your net pay — what actually lands in your bank account — not your gross salary. If your income varies (freelance, tips, commission, gig work), don’t use your best month. Instead:

    1. Pull your last 3–6 months of income
    2. Average it, or use your lowest realistic month as your baseline
    3. Treat anything above that baseline as a bonus to be allocated later, not spent in advance

    Budgeting off your best month is one of the fastest ways to end up short. Budgeting off your worst realistic month means every good month feels like a win instead of a scramble.


    Step 2: Track Where Your Money Is Actually Going

    This is the step people skip, and it’s the one that matters most.

    Pull your last full month of bank and credit card statements and sort every transaction into a small number of categories. Don’t overthink the categories at this stage — you’re just gathering evidence.

    A simple starting list:

    Most people are surprised by at least one number in this exercise — usually food, subscriptions, or “everything else.” That surprise is useful information, not something to feel bad about. You can’t fix a number you’ve never actually looked at.


    Step 3: Choose a Budgeting Method That Fits Your Life

    There isn’t one “correct” budgeting method — there’s the one you’ll actually keep using. Three of the most common approaches:

    The 50/30/20 Approach

    Roughly 50% of income to needs, 30% to wants, 20% to savings and debt payoff. Good for people who want simple guardrails without tracking every category closely. (We break this down in detail in our 50/30/20 Budget Rule guide.)

    Zero-Based Budgeting

    Every dollar of income gets assigned a job before the month starts, so income minus all allocations equals zero. Good for people who want maximum control and don’t mind a bit more setup time. (Full walkthrough here: Zero-Based Budgeting: A Beginner’s Guide.)

    The Pay-Yourself-First Method

    Savings and debt payments get set aside automatically the moment income arrives, and everything else gets spent freely from what’s left. Good for people who find detailed tracking exhausting and want simplicity over precision.

    None of these is objectively better. A detail-oriented person who enjoys the process might love zero-based budgeting. Someone who wants to set it and forget it might do better with pay-yourself-first. Pick based on your actual personality, not which one sounds the most disciplined.


    Step 4: Build the Budget Around Real Numbers

    Now combine what you learned in Steps 1–3 into an actual plan.

    1. List fixed expenses first — rent, insurance, loan payments, anything that doesn’t change month to month
    2. List variable-but-predictable expenses — groceries, gas, utilities that fluctuate a bit but happen every month
    3. Set aside irregular expenses — divide annual or occasional costs (car registration, holiday gifts, an annual subscription) by 12 and save that amount monthly, even if you don’t spend it every month
    4. Assign savings and debt payments — treat this like a bill, not a leftover
    5. Everything remaining goes to flexible spending — dining out, entertainment, hobbies

    The order matters. Most failed budgets start with flexible spending and hope savings will happen with whatever’s left over. Flip that order and savings becomes the thing that’s guaranteed, not the thing that’s optional.


    Step 5: Build In Slack — On Purpose

    Here’s the part most budgeting advice skips: a budget with zero flexibility is a budget designed to fail.

    If every dollar is precisely allocated and something unexpected comes up — and something always does — the whole system breaks and it feels like failure. Instead, build in a small buffer category, something like 5–10% of your income, labeled simply as “buffer” or “miscellaneous.” When life happens, it comes out of there instead of blowing up your grocery budget or your savings.

    This single change is often the difference between a budget that survives month three and one that gets abandoned after month one.


    Step 6: Track and Adjust Weekly, Not Just Monthly

    A budget isn’t something you set once. It’s something you check in on.

    A quick 10-minute weekly review — not a full audit, just a glance — lets you catch problems while they’re small. If you notice by week two that you’re already at 80% of your dining-out budget, you can course-correct instead of discovering it as a surprise on day 30.

    Weekly check-ins also make the monthly reset far less painful. Instead of confronting a month’s worth of decisions all at once, you’re adjusting in small increments the whole way through.


    Common Budgeting Mistakes to Avoid

    • Copying someone else’s percentages exactly. A “healthy” housing percentage in a big city looks very different than in a small town. Use guidelines as a starting point, not gospel.
    • Making the budget too detailed too fast. Twenty categories in month one usually means an abandoned budget in month two. Start broad, get more specific once the habit sticks.
    • Forgetting irregular expenses exist. If you don’t plan for them monthly, they show up as “emergencies” every single time.
    • Punishing yourself for going over. A budget isn’t a moral report card. Going over in one category one month is data, not a failure — use it to adjust next month’s numbers.
    • Never revisiting the budget after building it. Your first draft is a starting point, not a permanent contract. Expect to adjust it for the first 2–3 months as you learn your real patterns.

    A Simple Example

    Say your take-home pay is $3,600 a month. Using the order from Step 4:

    • Fixed expenses (rent, insurance, minimum debt payments): $1,800
    • Predictable variable expenses (groceries, gas, utilities): $600
    • Irregular expenses set aside (car maintenance, gifts, annual fees): $150
    • Savings and extra debt payoff: $500
    • Buffer: $200
    • Flexible spending (dining out, entertainment, everything else): $350

    Total: $3,600. Every dollar has a job, savings is locked in before spending happens, and there’s a built-in cushion for the unexpected. That’s a budget that can survive contact with a real month.


    Frequently Asked Questions

    How much of my income should go to savings?

    A common starting target is 20%, but it depends heavily on your situation. If you’re carrying high-interest debt, prioritize paying that down first — the “savings” you get from eliminating a 22% interest rate often beats what you’d earn keeping cash in a standard savings account. Start with whatever percentage is realistic today and increase it as your income grows or expenses shrink.

    What if my income changes every month?

    Budget off your lowest realistic month rather than your average, and treat any income above that as a bonus to allocate — split between savings, debt, and a little flexible spending — rather than spending it in advance.

    Should I budget with a spreadsheet or an app?

    Whichever one you’ll actually open regularly. A spreadsheet gives more control but requires manual updates; an app usually syncs to your accounts automatically, which removes friction for a lot of people. (We compare several options in our Best Budgeting Apps for Beginners guide.)

    How long does it take for a budget to actually work?

    Give it 2–3 full months before judging whether it’s working. The first month is almost always inaccurate because you’re still discovering your real spending patterns — the adjustments you make in months two and three are usually what make it stick long-term.

    What’s the difference between a budget and just tracking expenses?

    Tracking tells you where money went. Budgeting tells money where to go before you spend it. Tracking is a useful first step (see Step 2 above), but budgeting is what actually changes outcomes.


    Key Takeaways

    • Build your budget from real numbers, not estimates — track before you plan
    • Choose a method that matches your personality, not the one that sounds most “disciplined”
    • Assign savings and debt payments before flexible spending, not after
    • Build in a buffer category on purpose — a budget with zero flexibility is a budget designed to break
    • Check in weekly, adjust monthly, and expect your first draft to change over the first few months

    Once your monthly budget is in place, the next logical step is making sure you have a safety net for when life doesn’t go according to plan — see our guide on how to build an emergency fund step by step. And if manually tracking everything feels like too much friction, our roundup of the best budgeting apps for beginners can automate most of this process for you.

    This article is for informational purposes only and is not financial advice.